


Viewer Edit Mode
Manually adjust, add, remove, and rotate boxes in the 3D viewer to fine-tune your stacking plan.
Getting Started
In Edit Mode you can reposition individual boxes, rotate them, select and move groups, add new boxes using auto-place, and remove boxes you do not need. All changes can be undone or reset to the original AI-calculated result.
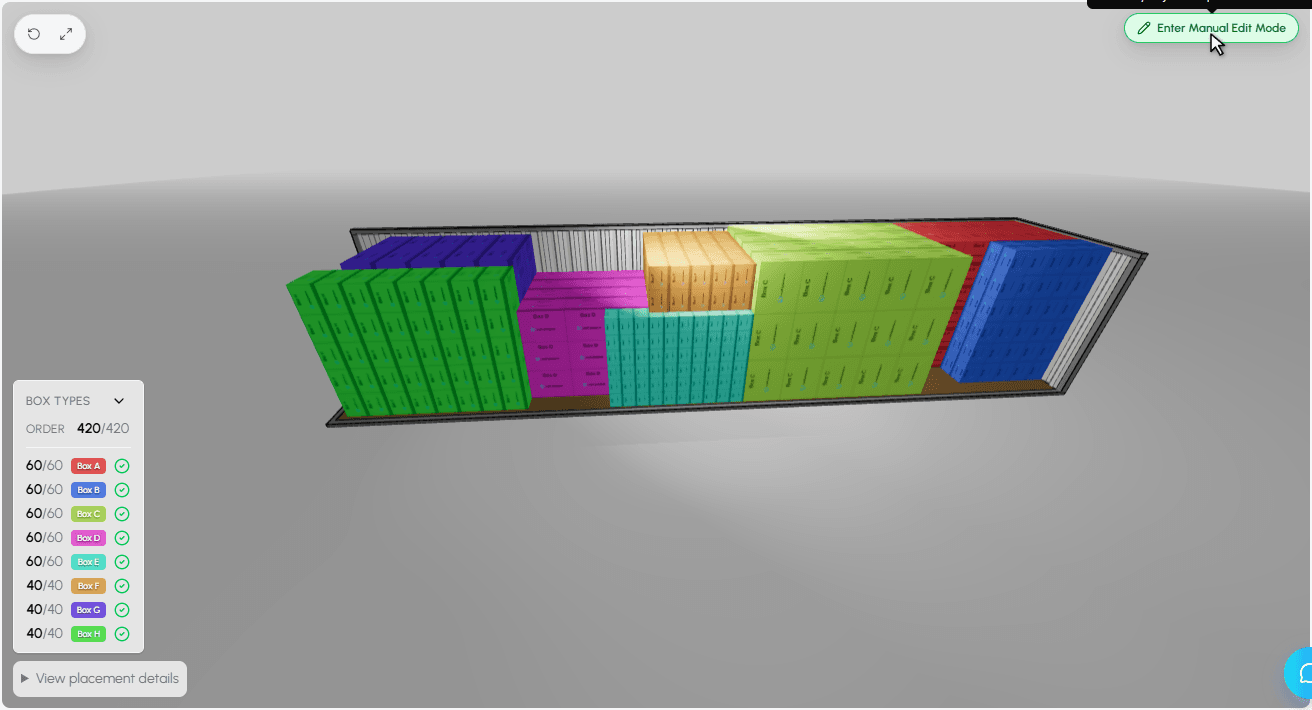
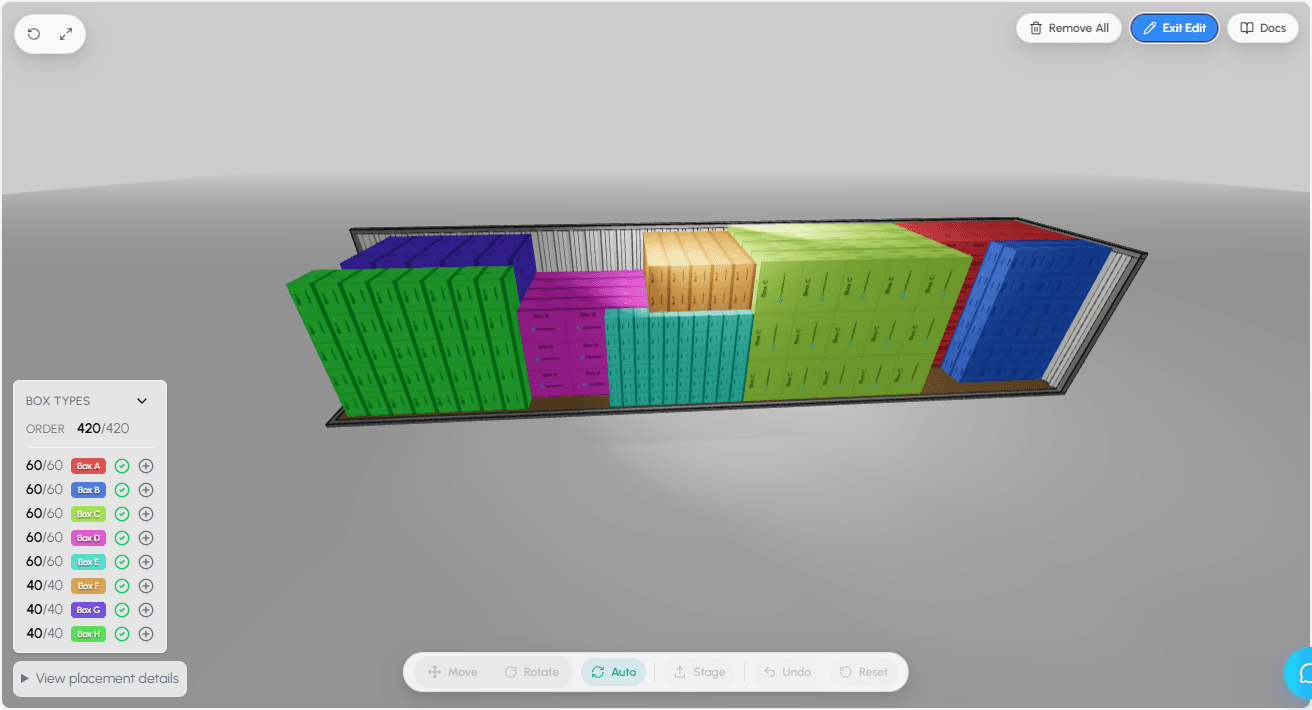
Workflow Overview
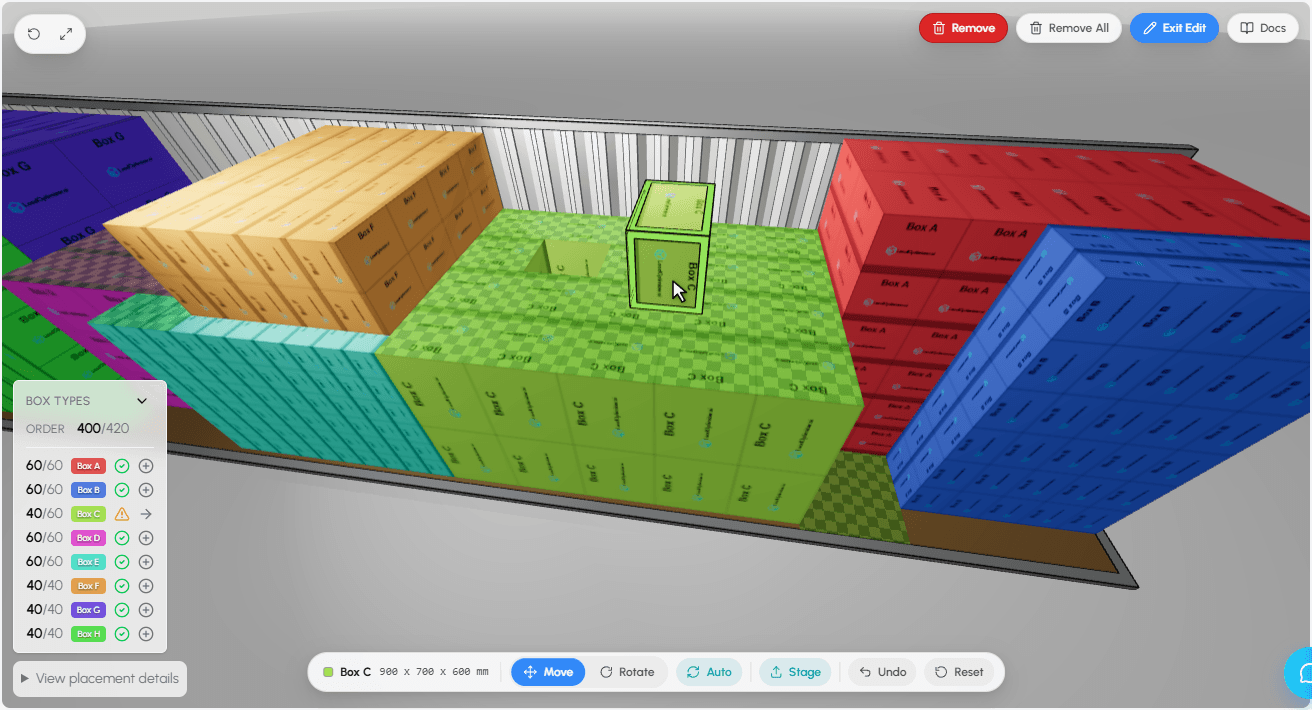
Selecting and Moving Boxes
Click on boxes to select and reposition them within the carrier.
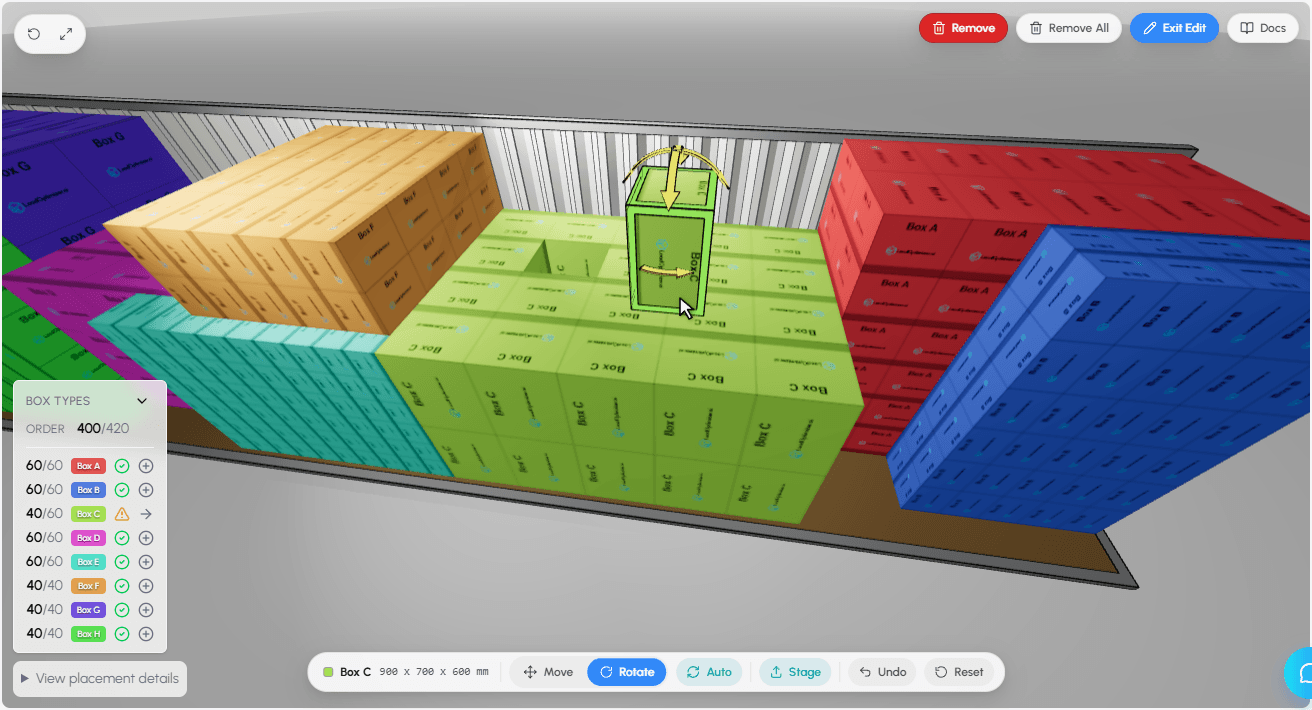
Rotating Boxes
Change box orientation manually or let the system find the best fit automatically.
Working with Groups
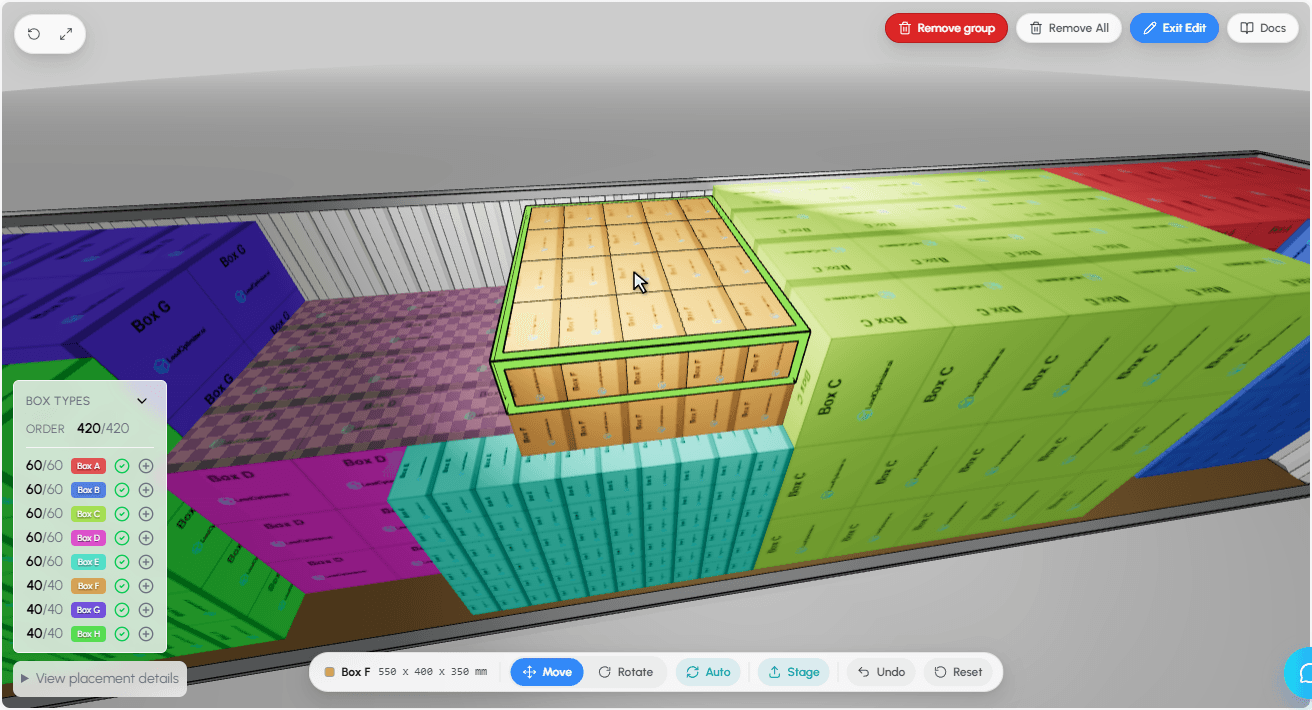
Staging Panel
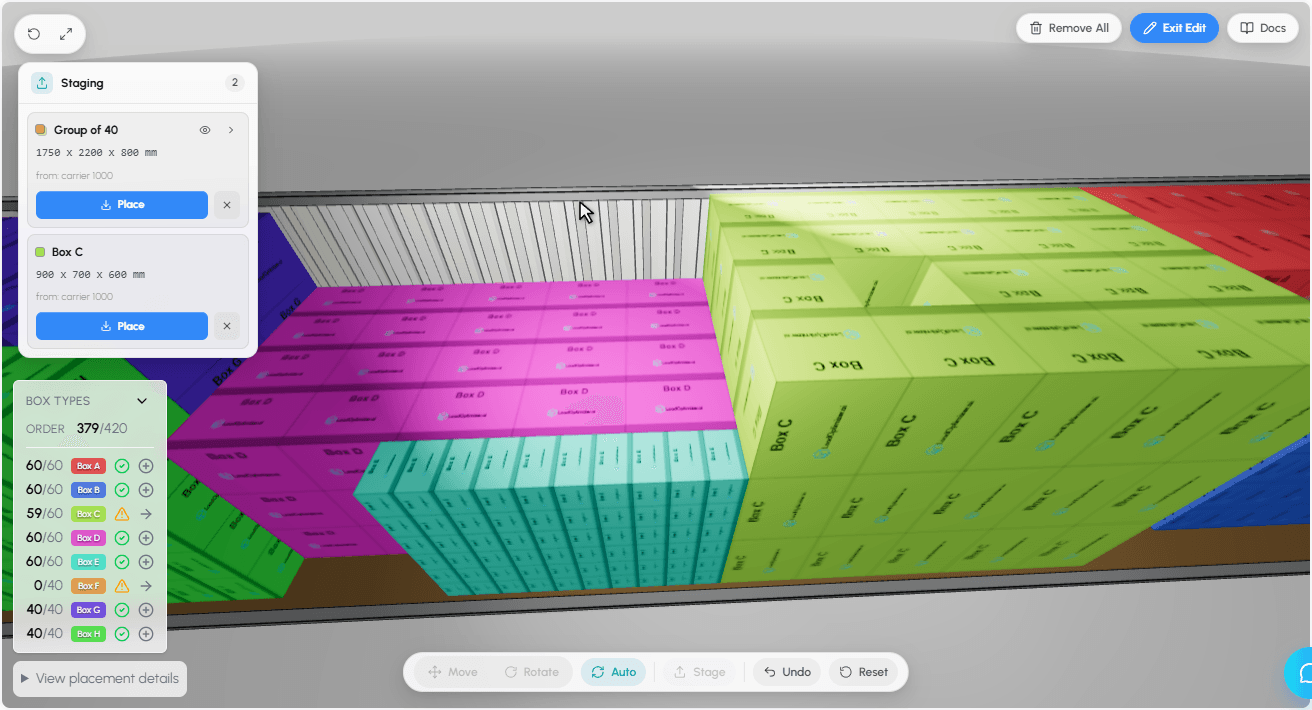
The staging panel is a clipboard-style shelf in the top-left of the viewer. It lets you temporarily lift a box (or a whole multi-box group) out of a carrier so you can rearrange the remaining cargo, then place the staged item back into the same carrier or into a different one. Every stage, place, and discard action is undoable with Ctrl+Z and re-doable with Ctrl+Shift+Z.
Stage the Selection
Select a single box or a multi-box group, then click the Stage button in the toolbar (or press S). The boxes are removed from their carrier and parked on the staging panel as a single chip. The chip preserves the original box identity, dimensions, color, and source carrier.
Single-Box Chips
Show a color swatch matching the box, the box display name, dimensions in mm, and a "from: carrier <id>" line so you can always tell where the box originated.
Group Chips
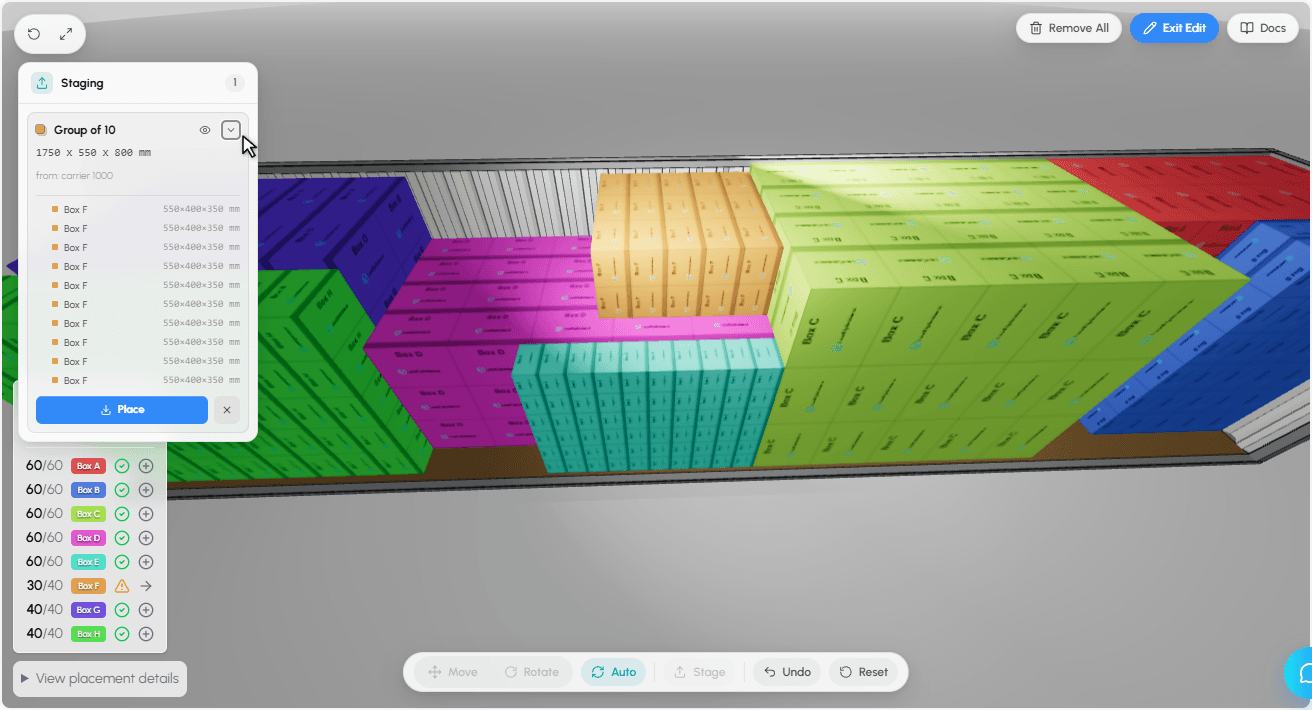
A multi-box group becomes a single chip labeled "Group of N" with the cluster's bounding-box dimensions. Click the eye icon for a 3D preview of the group layout, or the chevron to expand an inline list of every member box with its own swatch and dimensions.
Place a Chip
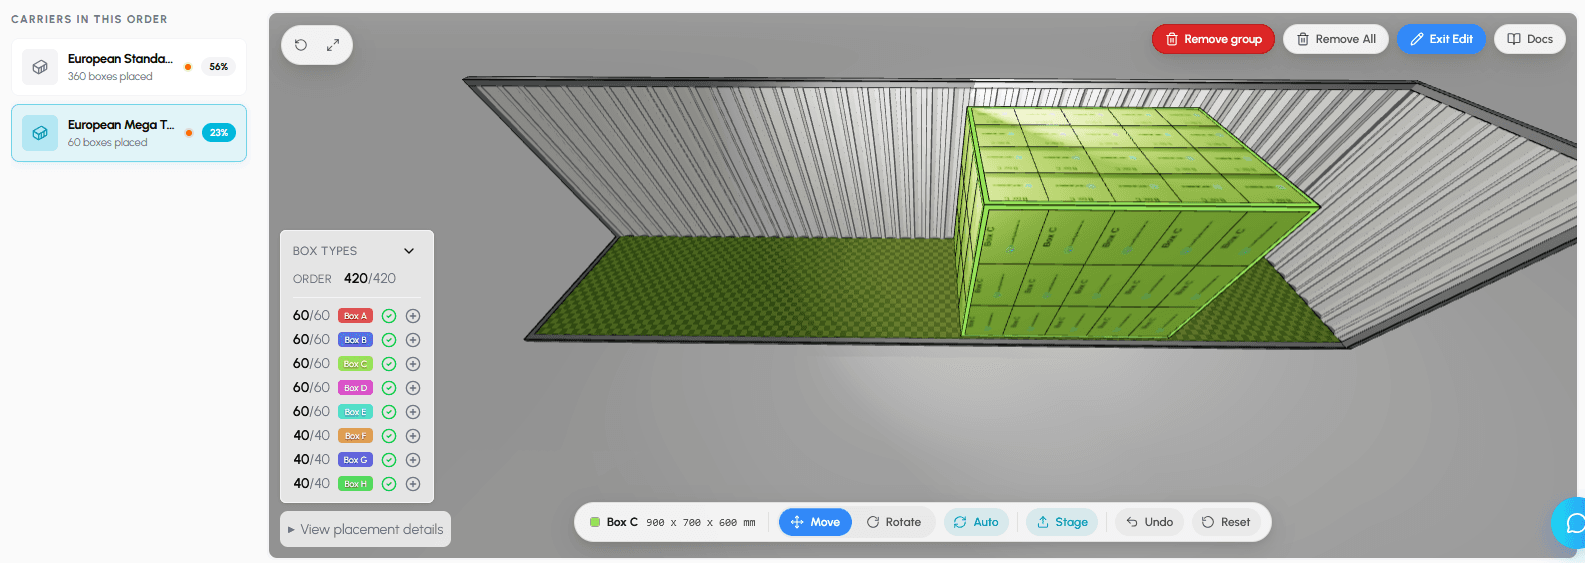
Click Place on a chip to insert its contents into the currently active carrier. The box (or whole group) appears at the carrier origin and follows the cursor. Click in the scene to commit the placement.
Discard a Chip
Click the small × on a chip to remove it without restoring the boxes to any carrier. Discards are undoable with Ctrl+Z, so an accidental click is recoverable.
Collapse the Panel
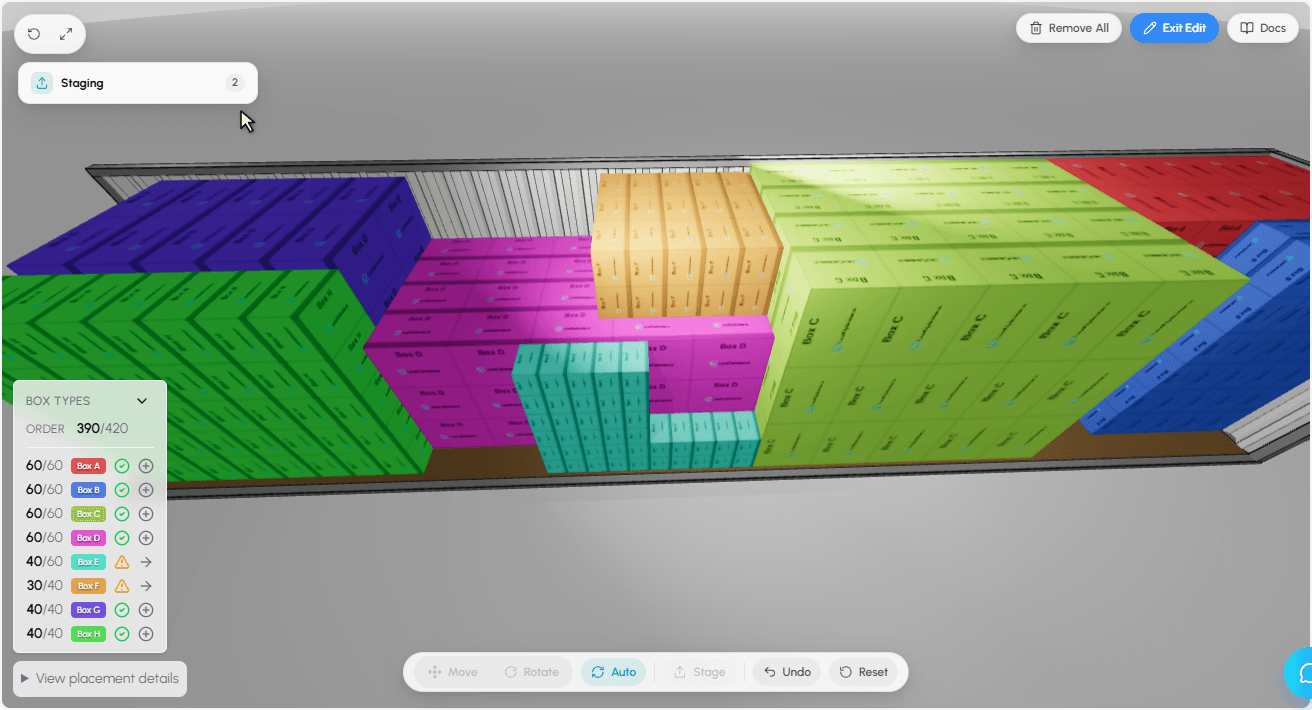
Click the "Staging (N)" header to collapse the panel down to a single header line. The chips stay on the shelf; the panel only hides them visually so they don't obscure the 3D scene.
Moving Boxes Between Carriers
To move a box (or a whole group) from one carrier to another, use the staging panel as the bridge. The shelf is global to the edit session, so chips stay visible while you switch the active carrier. Place always inserts into whichever carrier is currently active.
In the source carrier, click the box you want to move. To move multiple boxes together, hold Shift and click each additional box to build a group selection.
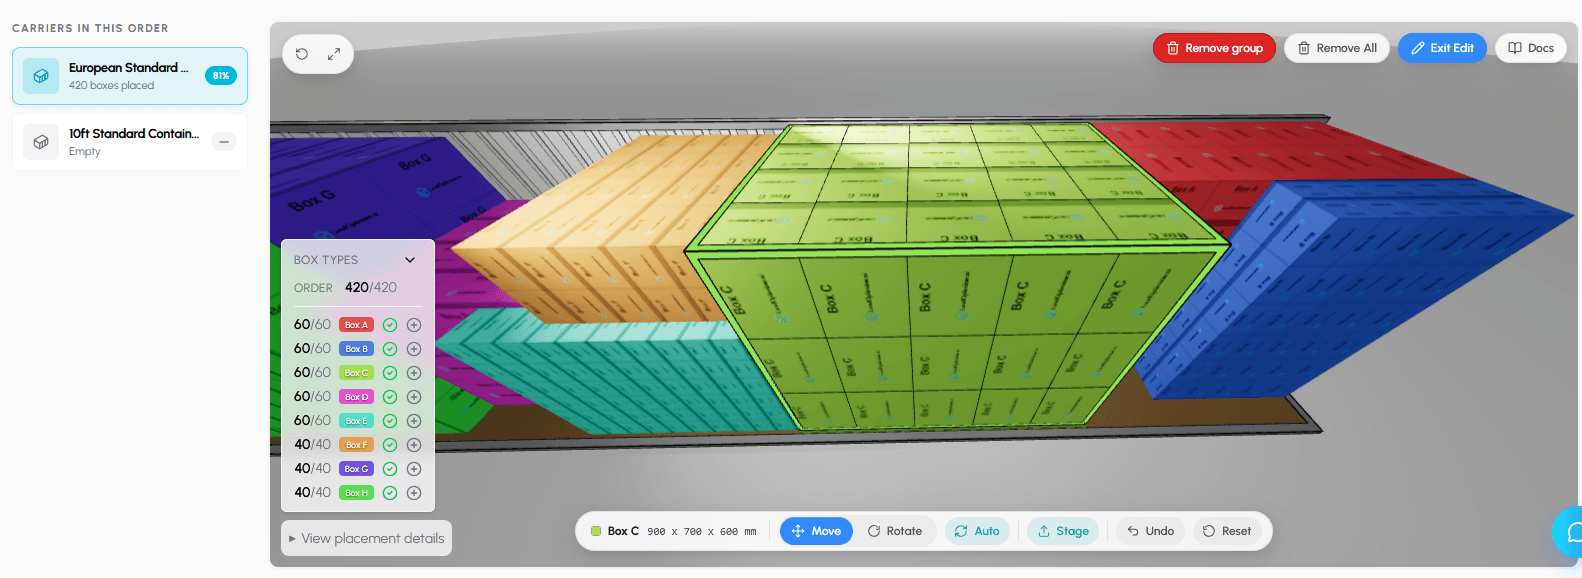
Click the Stage button in the toolbar (or press the S key) to send the selection to the staging panel. The chip appears on the shelf with the source carrier label preserved.
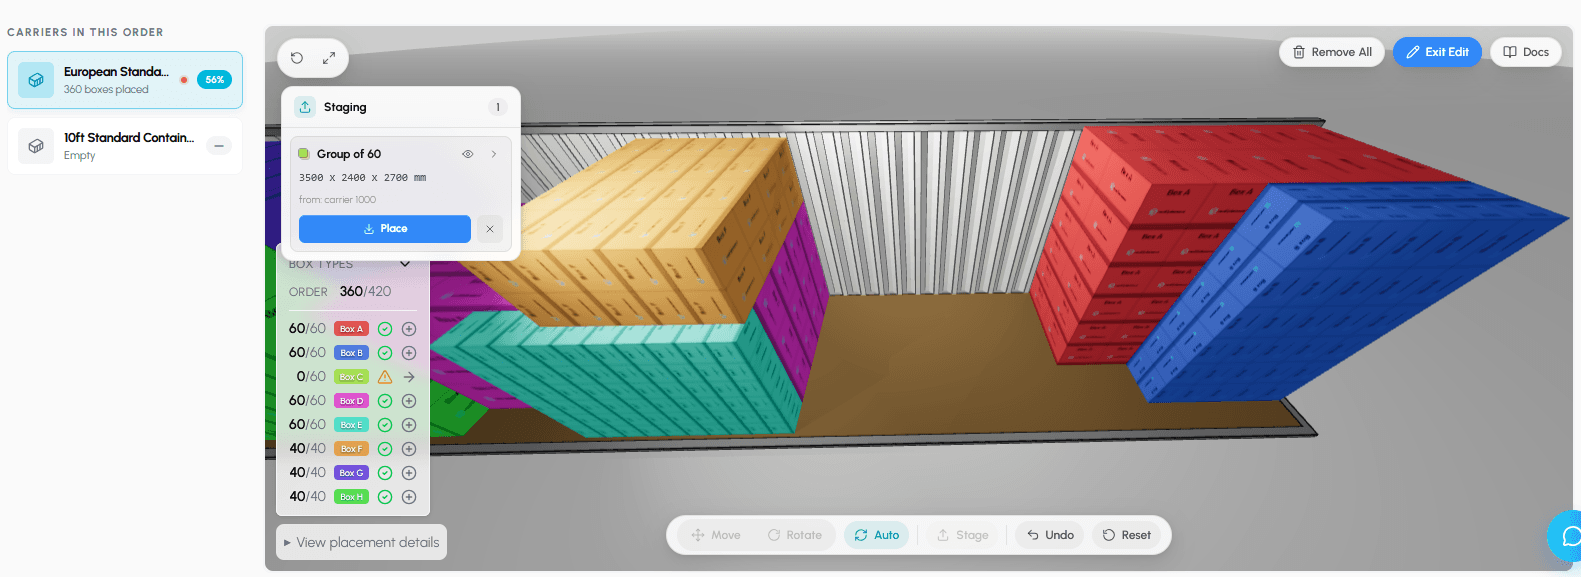
Use the existing carrier navigation to switch the active carrier to the destination. The staging panel and all of its chips stay visible across the switch.
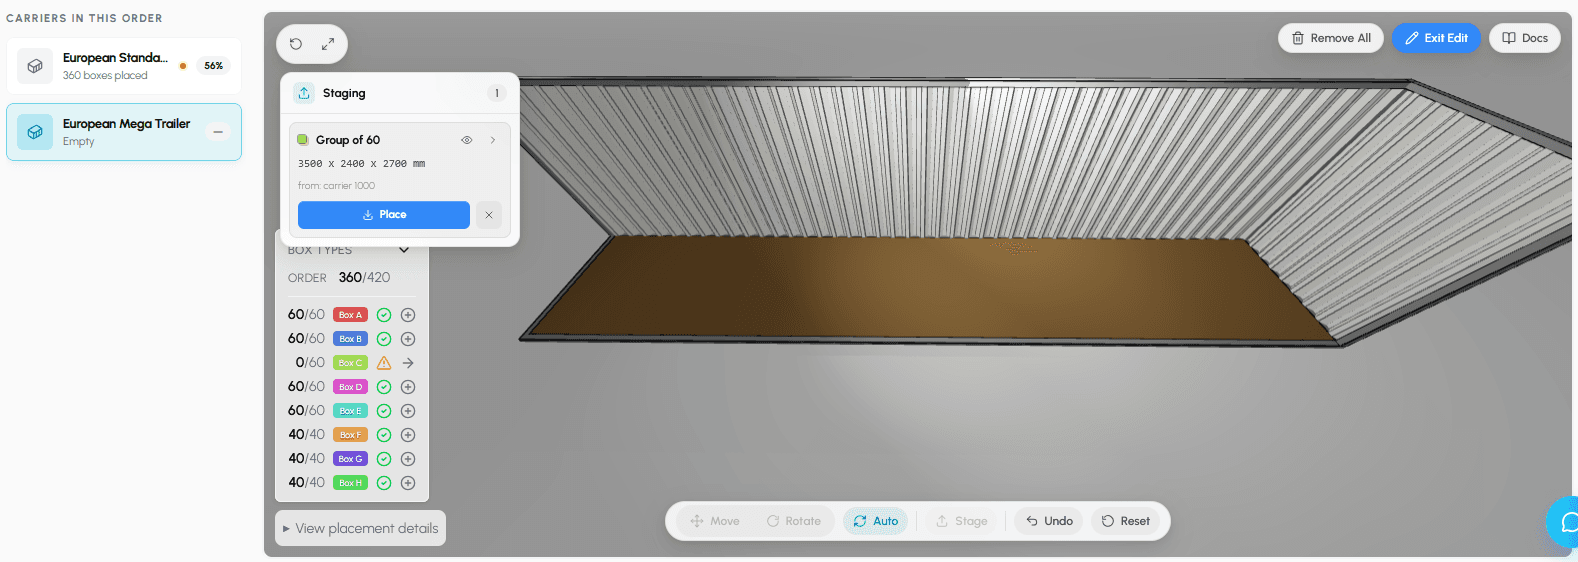
Click Place on the chip. The boxes are added to the destination carrier and enter cursor-follow placement; click in the scene to commit. Their original IDs, dimensions, rotation, and metadata are unchanged.
Adding Boxes with Auto-Place
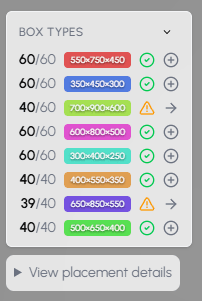
The Box Types panel appears on the side of the viewer in Edit Mode. It shows each box type from your order with a count of how many are currently placed.
Auto-Place Remaining Boxes
When not all boxes of a type are placed, an amber warning icon is shown. Click the arrow button next to that box type to auto-place one box at the optimal position. Repeat to place additional boxes one at a time.
Add Extra Boxes
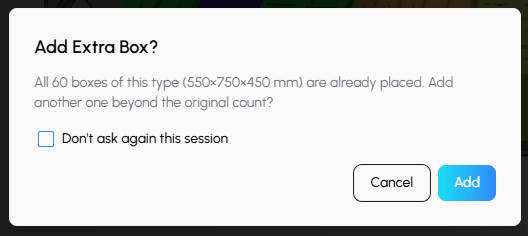
When all boxes of a type are placed, a green check icon is shown. Click the plus button to add an extra box beyond the original count. A confirmation dialog will ask you to confirm before adding.
Box Does Not Fit
If there is no space available for the box, a dialog will inform you. Try removing some boxes first to free up space, then try again.
Fine-Tune After Placing
After auto-placing a box, you can still select and move it to a different position. Auto-placed boxes behave the same as any other box in edit mode.
Removing Boxes
Toolbar Reference
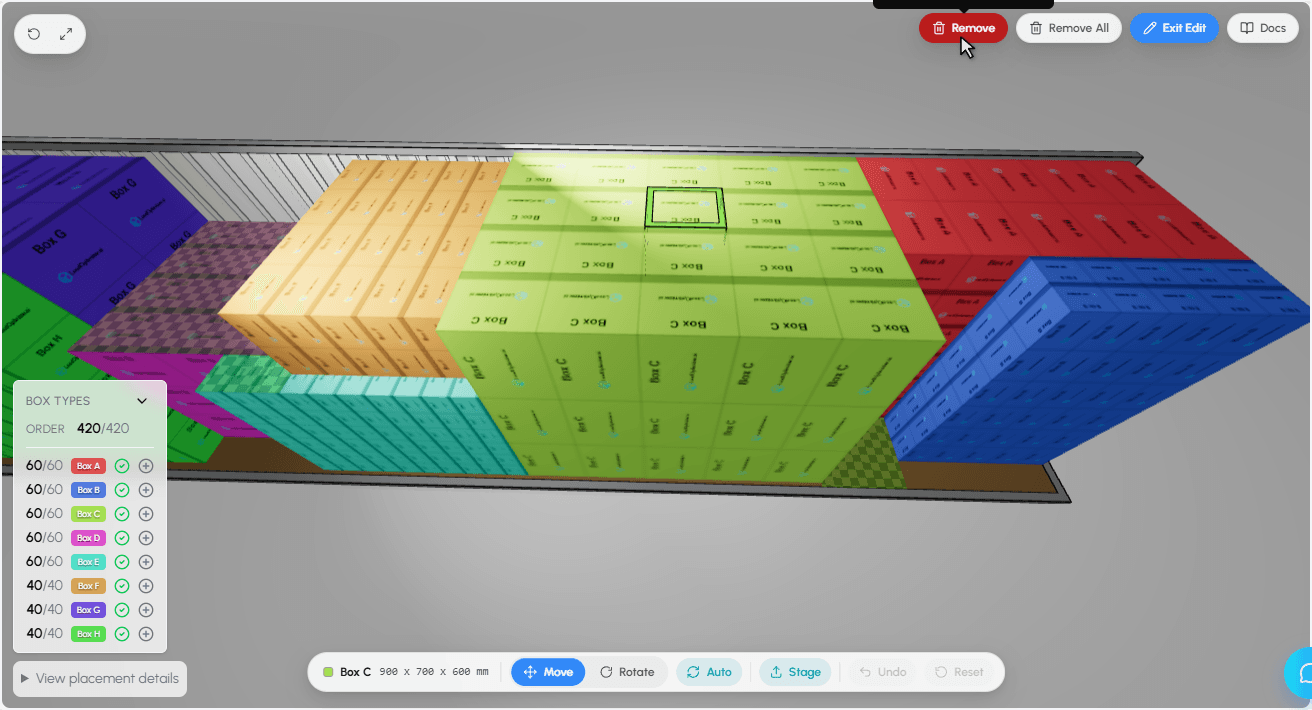
A floating toolbar appears at the bottom of the viewer when Edit Mode is active.
Box Info
Displays the name and dimensions (W x L x H in mm) of the currently selected box.
Stage
Sends the current selection (a single box or a multi-box group) to the staging panel. Disabled when nothing is selected. Keyboard shortcut: S.
Move / Rotate Toggle
Switch between Move and Rotate modes. Move lets you reposition boxes, Rotate lets you change their orientation.
Auto-Rotate
When enabled, boxes automatically rotate to find the best fit as you drag them into position.
Undo
Reverts the last action. You can also use the Ctrl+Z keyboard shortcut.
Reset
Returns all boxes to their original AI-calculated positions, undoing all manual adjustments at once.
Height Warning
A red warning appears when a box exceeds the container height. Reposition the box to resolve the violation.

Keyboard Shortcuts
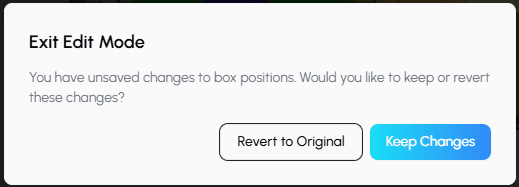
Exiting Edit Mode
Related Documentation
Learn more about the 3D viewer controls and creating loads.